
If you’re like me, your passion for cross stitch means you’ve got a collection of beautiful pieces just waiting to be shown off. Let’s explore some creative ways to display your handiwork that go beyond the typical frame.
1. Make a Canvas Frame
Wrap your cross stitch around a canvas frame for a modern, textured look. It’s a quick and easy way to achieve a professional finish. This works especially well for abstract designs or geometric patterns. I find that a simple back stitch around the edges secures the fabric perfectly.
May just do the trick:
- Blank Canvas Frames: Wrap your cross stitch easily around these sturdy frames for a sleek, polished finish.
- Cross Stitch Adhesive Tape: Secure your artwork to the frame effortlessly with strong, fabric-friendly adhesive tape.
- Wooden Frame Mounting Kit: Assemble professional-looking frames with this comprehensive and durable mounting kit.


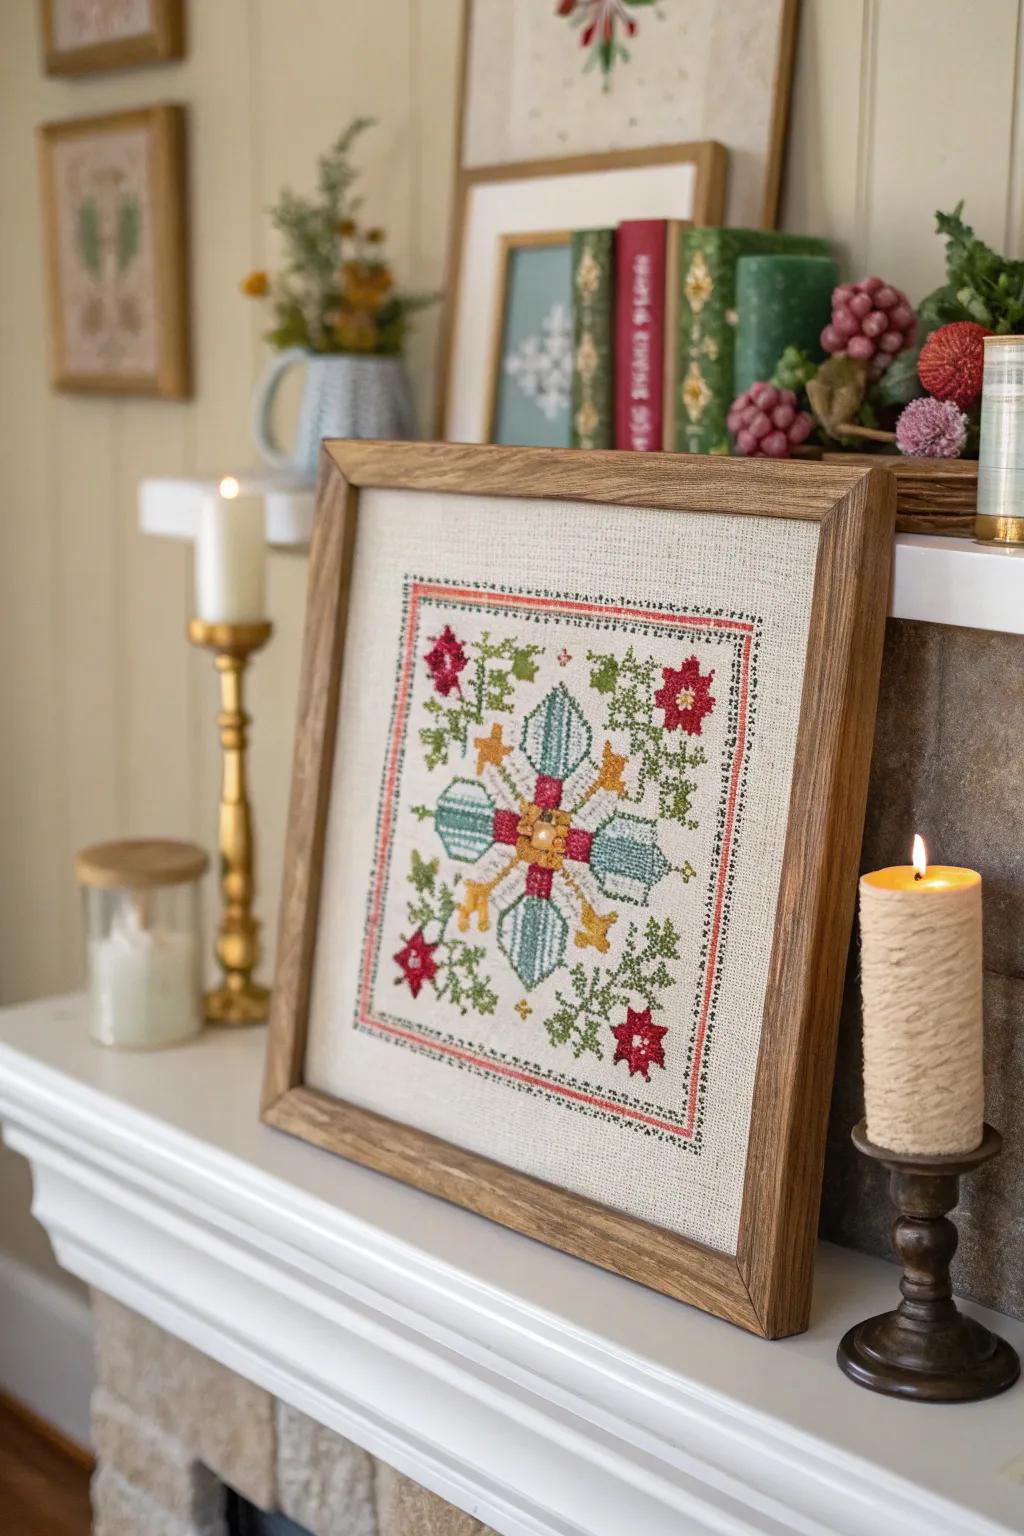
2. Use Hanging Rods
Display your work on hanging rods for a tapestry-like presentation. This method adds a touch of elegance and is perfect for larger designs. Choose decorative rods that complement the colors in your cross stitch. I once used antique curtain rods for a client’s historical piece, and it looked fantastic.
Check these products out:
- Wooden Tapestry Hanging Rod: Enhance your décor with this rustic wooden rod, perfect for showcasing your cross-stitch masterpiece.
- Decorative Wall Hooks: Securely hang your artwork with stylish hooks, adding elegance and charm to your display.
- Adjustable Hanging Cord: Easily adjust the hanging length of your artwork with this durable and sleek cord.


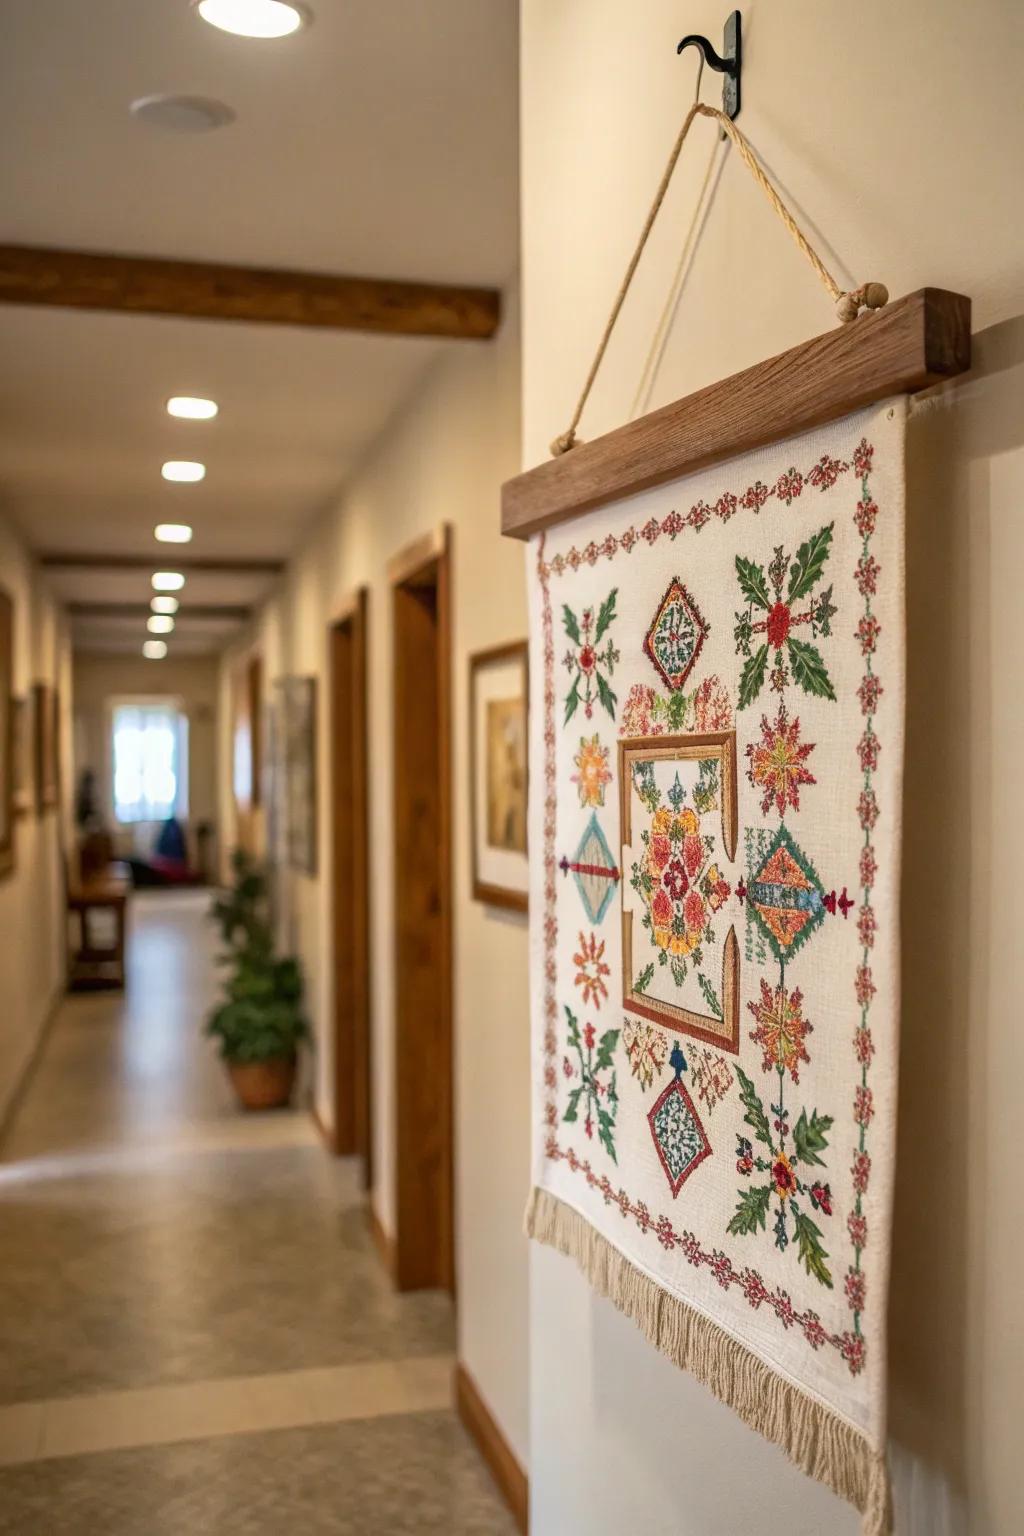
3. Create Personalized Designs
Design personalized cross stitch pieces to celebrate special occasions or family names. I’ve done this for weddings and it’s always a hit. These make heartwarming gifts that the recipients will cherish forever. I think adding the date of the occasion makes it even more special.
Possibly handy products:
- Cross Stitch Pattern Software: Design unique personalized patterns easily for weddings and special occasions with intuitive software.
- Embroidery Thread Set: Choose from a colorful assortment of threads to make your personalized designs truly stand out.
- Wooden Embroidery Hoops: Secure your cross stitch fabric with sturdy wooden hoops for a perfect craft experience.


4. Frame It in Embroidery Hoops
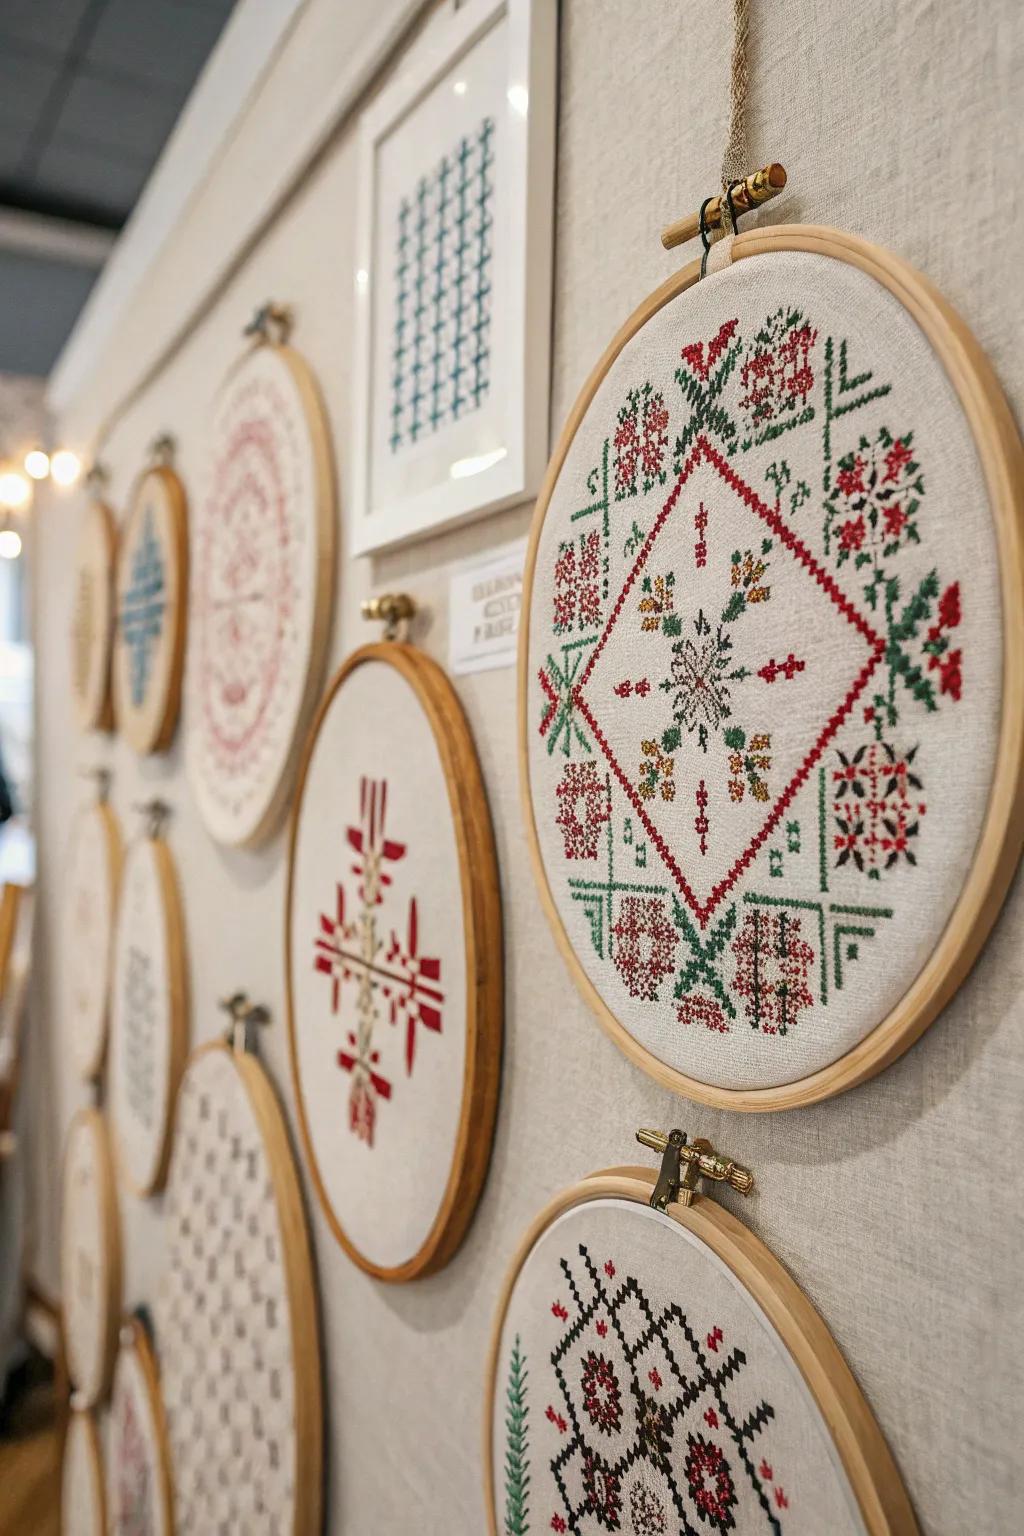
Using embroidery hoops is a classic yet chic way to display your cross stitch. I love hanging them in clusters for a homey, handmade gallery wall vibe. You can paint the hoops to match your decor or leave them natural for a rustic feel. I’ve even added small embellishments like beads or lace to the hoops for extra flair.
Give these a look:
- Wooden Embroidery Hoops Set: Create stunning gallery displays with assorted wooden hoops for your cross stitch projects.
- Embroidery Hoop Hanging Kit: Effortlessly hang your embroidery art with this complete hanging kit.
- Cross Stitch Starter Kit: Dive into cross stitching with ease using this comprehensive starter kit.
5. Use Pegboards
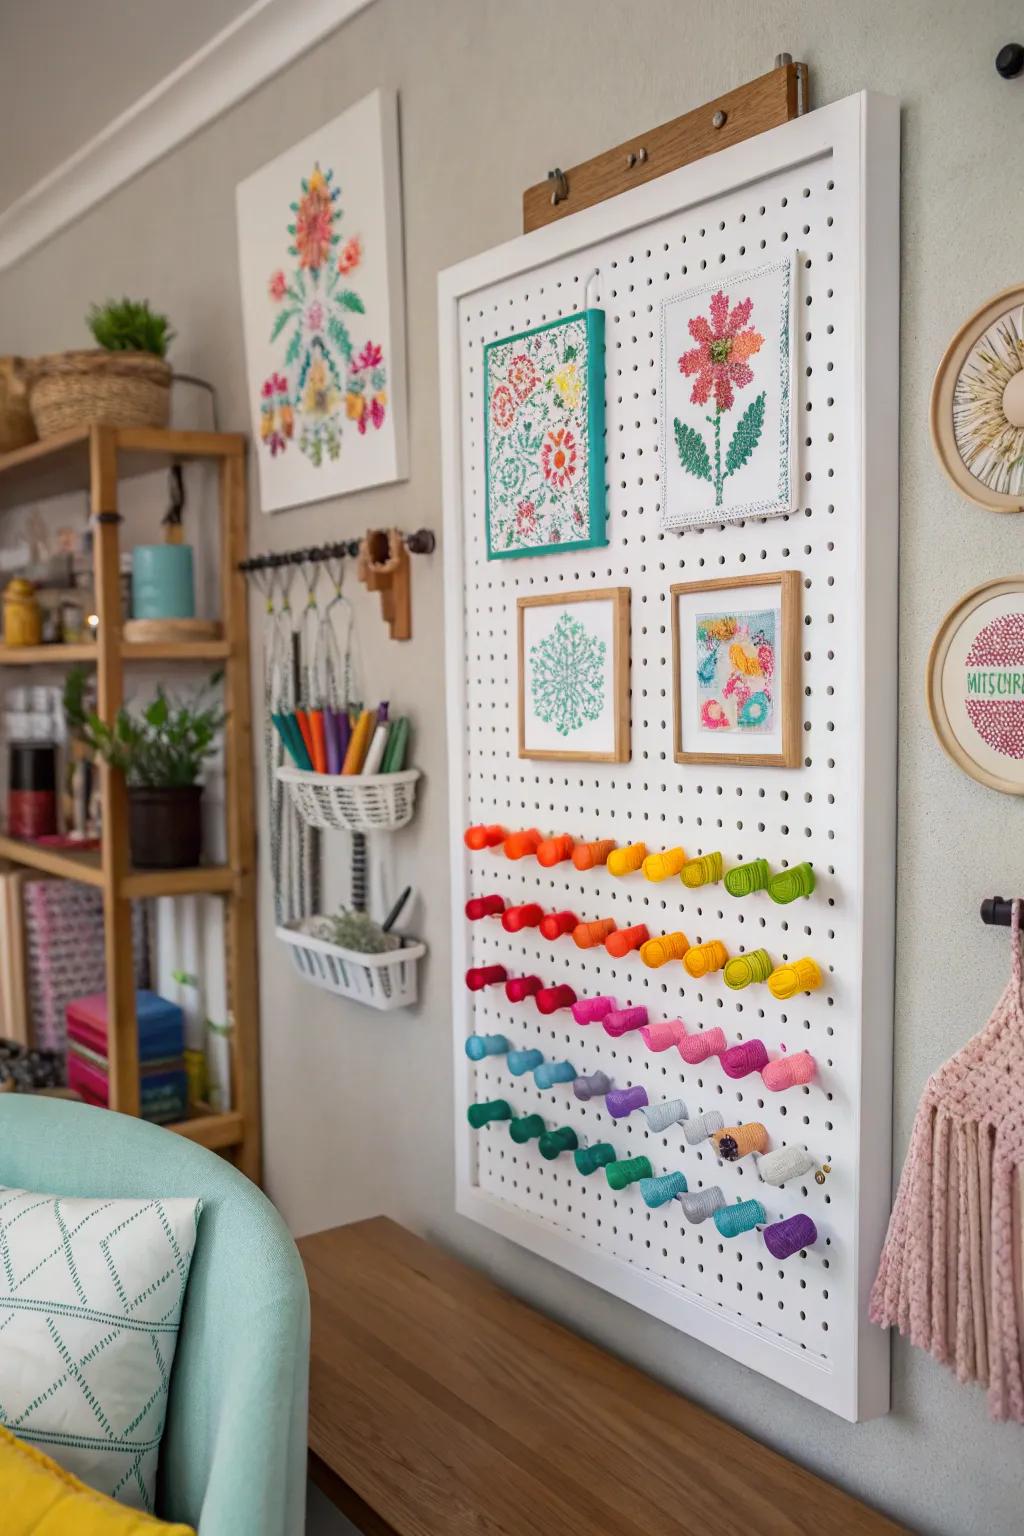
Attach your cross stitch to a pegboard for a playful, customizable display. I like rearranging mine when I need a quick decor refresh. This is a great option if you like to switch up your decor frequently. I have a small pegboard in my craft room just for this purpose.
These products might be useful:
- Wall Mounted Pegboard Panel Set: Organize creatively by attaching your cross stitch projects with this versatile wall-mounted pegboard.
- Wooden Pegboard Hooks Assortment Kit: Enhance your display with a variety of hooks perfect for holding cross stitch pieces securely.
- Decorative Pegboard Baskets: Utilize decorative baskets to store and display cross stitch tools and threads beautifully.
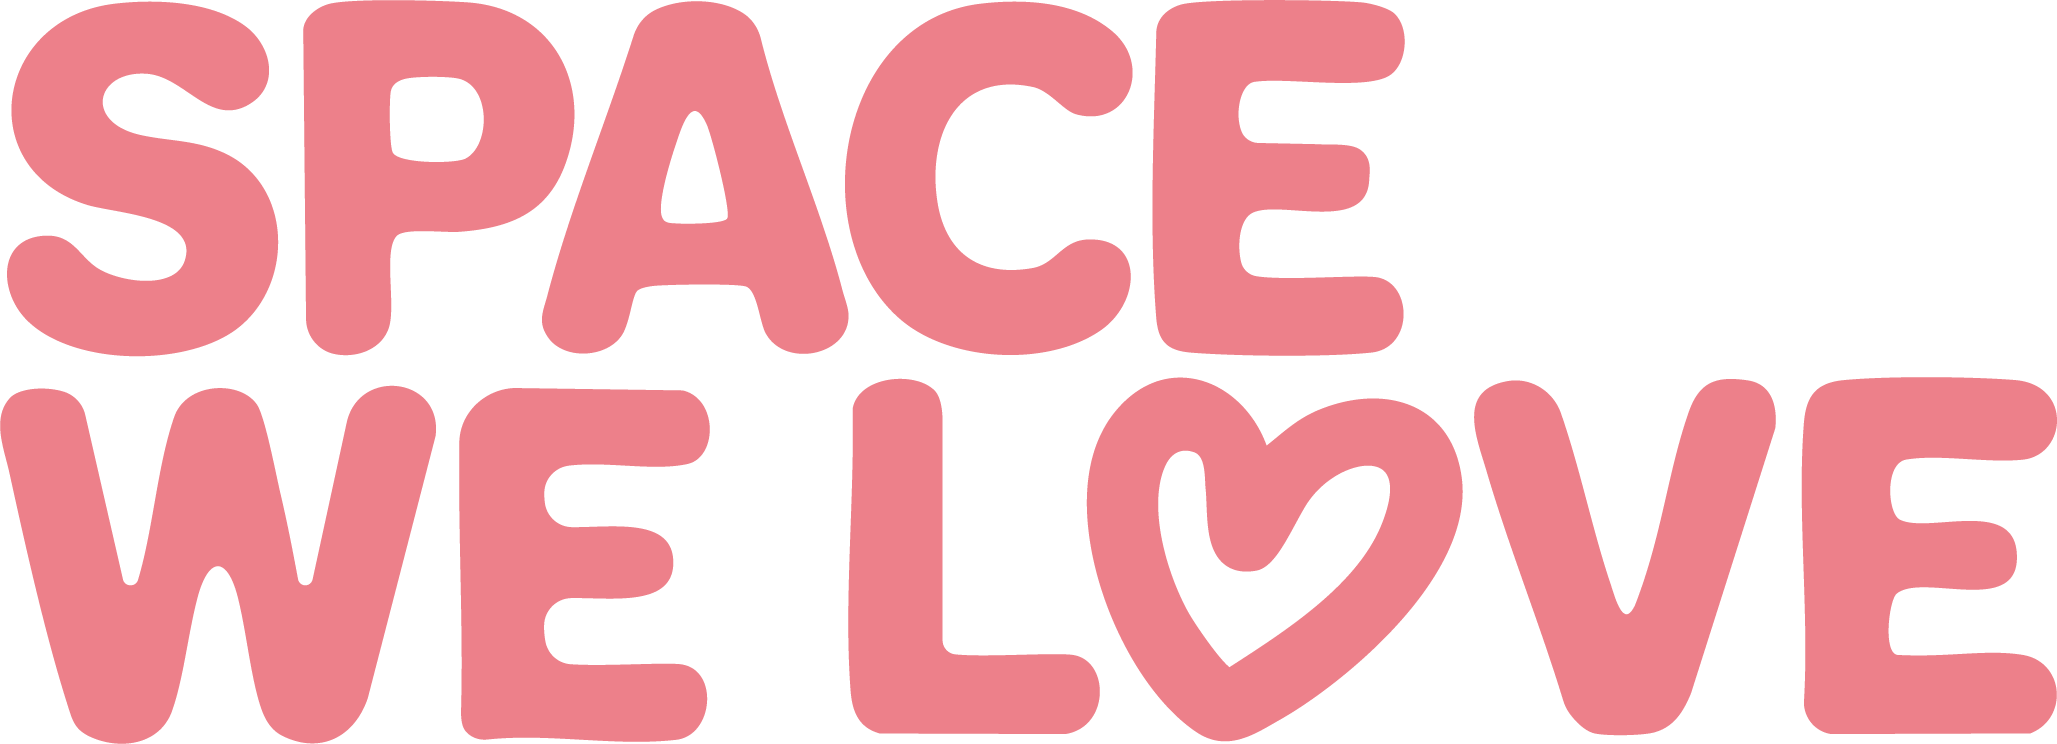
6. Display on Shelves
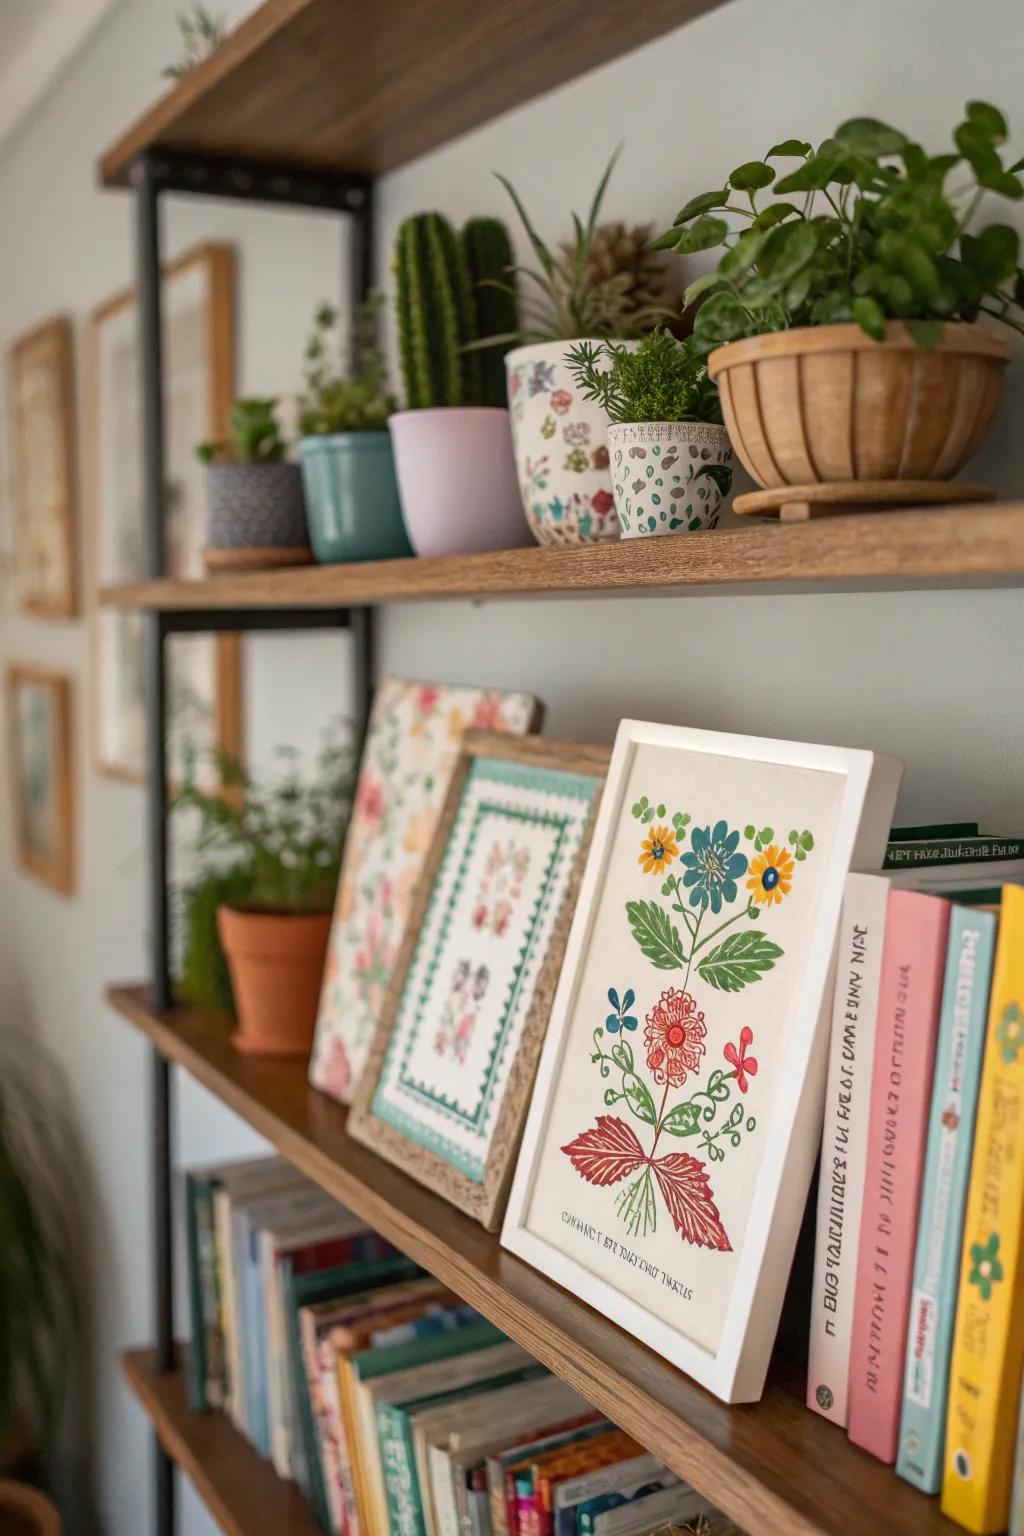
Lean framed or hoop-mounted cross stitch pieces on shelves for a casual, layered look. It’s a great way to add texture to a bookcase. This works especially well with different sized pieces and varying frame styles. I often use this method to display my seasonal cross stitch projects.
Try these:
- Decorative Plant Pots: Brighten your shelves with plant pots, adding a natural touch beside your cross stitch art.
- Wooden Floating Shelves: Enhance your room with stylish wooden shelves, perfect for displaying art and books together.
- Cross Stitch Display Frames: Frame your cross stitch designs in beautiful frames to create a cohesive gallery-like shelf display.


7. Incorporate into Lampshades
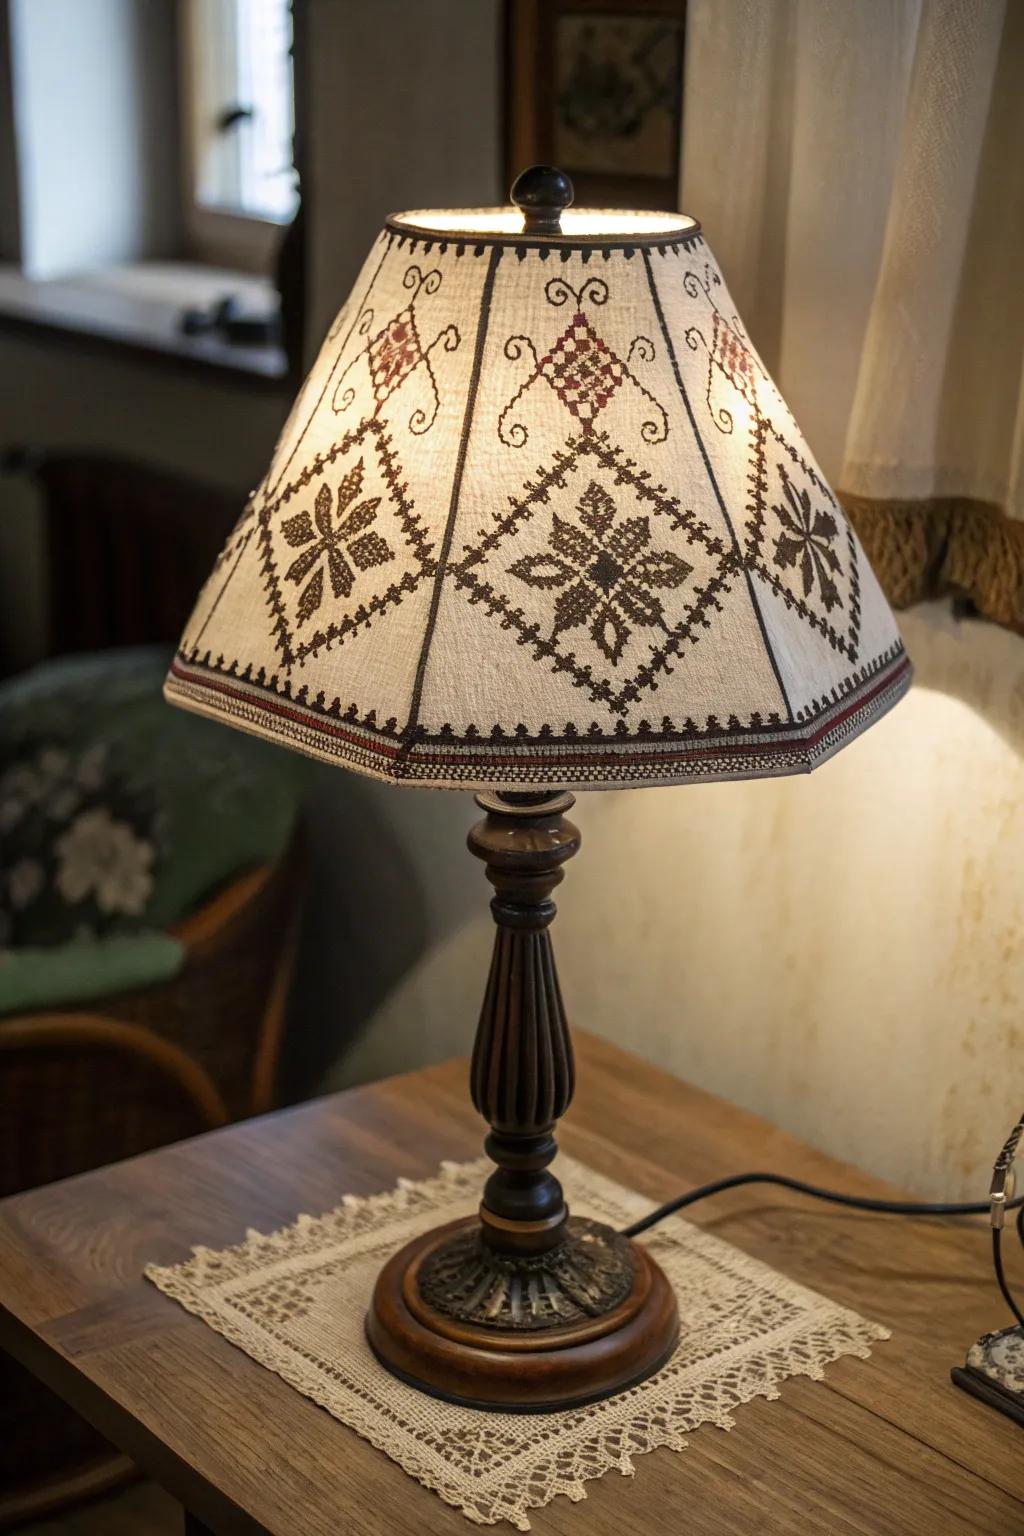
Transform your cross stitch into a unique lampshade for a cozy glow. My personal favorite is a floral pattern that casts lovely shadows. Choose a simple lampshade shape so the cross stitch design really shines. I have plans to make one with a constellation pattern next.
Consider these options:
- Lampshade making kit: Create personalized lampshades with an easy-to-use kit, perfect for showcasing cross stitch designs.
- Fabric glue for crafts: Securely attach your cross stitch to lampshades with durable, clear-drying fabric glue.
- Embroidery hoops for beginners: Keep your cross stitch tight and even with a reliable, versatile embroidery hoop.
8. Create a Gallery Wall
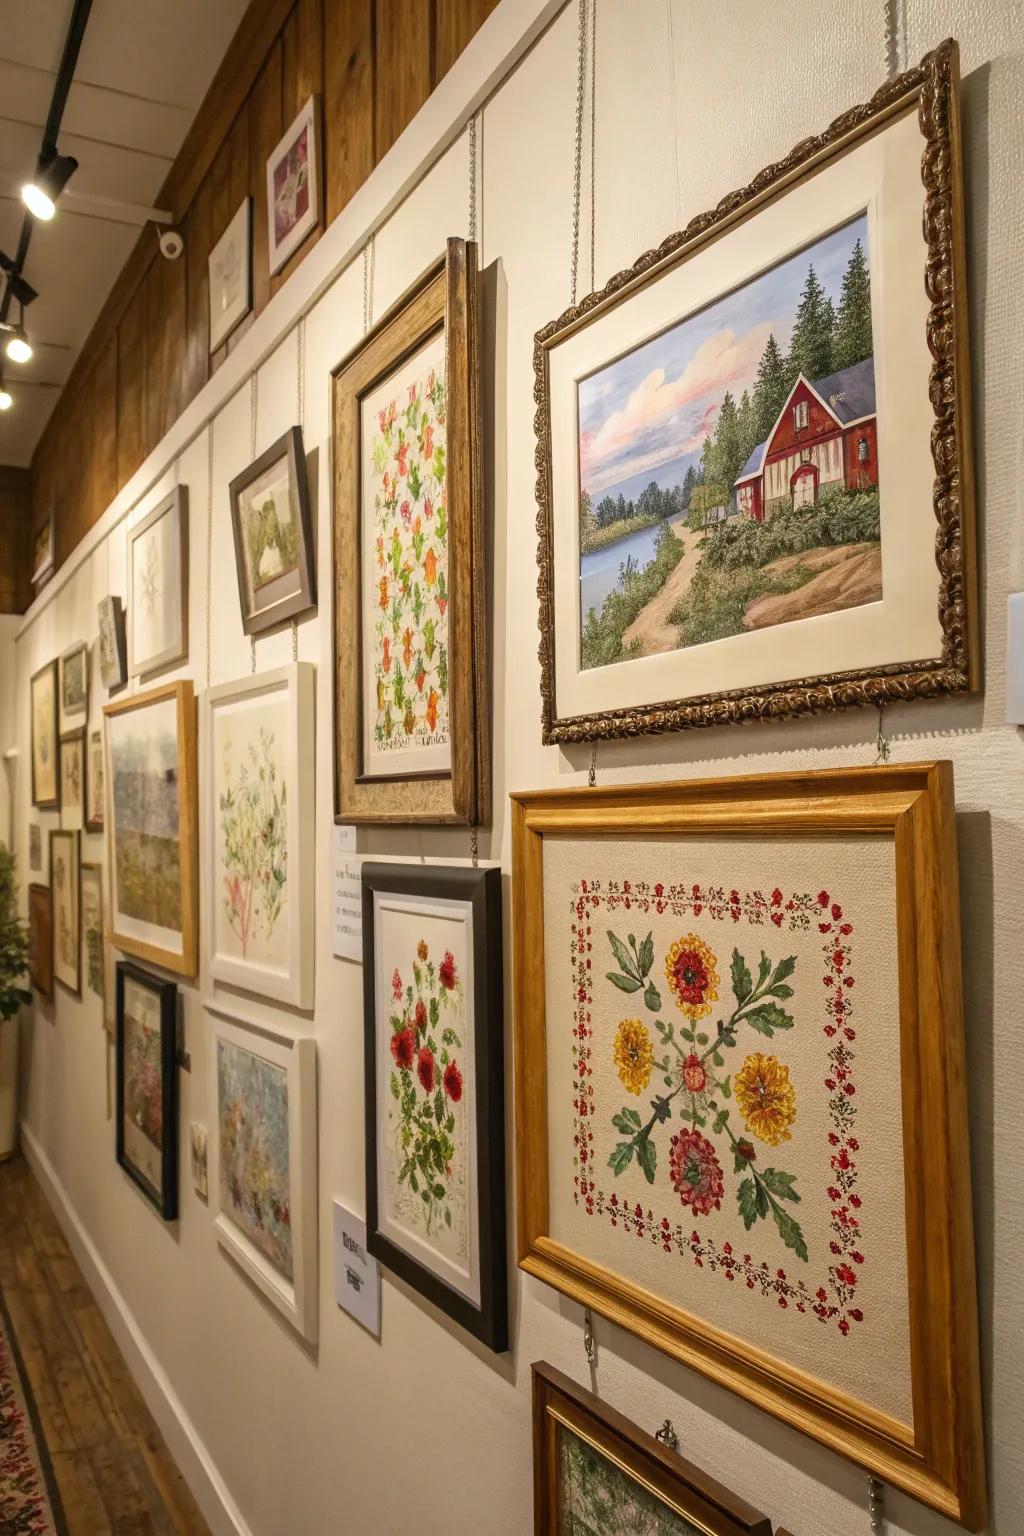
Combine various framed cross stitch designs to create a stunning gallery wall. I often mix in other art pieces to add depth and interest. Be sure to vary the sizes and frame styles for a more eclectic look. I recently created a gallery wall for a client using a mix of vintage and modern frames.
Explore these options:
- Wooden Picture Frames Set: Showcase your cross stitch art beautifully with a sophisticated set of wooden picture frames.
- Gallery Wall Hanging Kit: Easily arrange your gallery with a comprehensive wall hanging kit, ensuring perfect alignment and secure installation.
- LED Art Display Lights: Illuminate your gallery wall elegantly with adjustable LED lights, enhancing the visual appeal of artwork.
9. Transform Into Ornaments
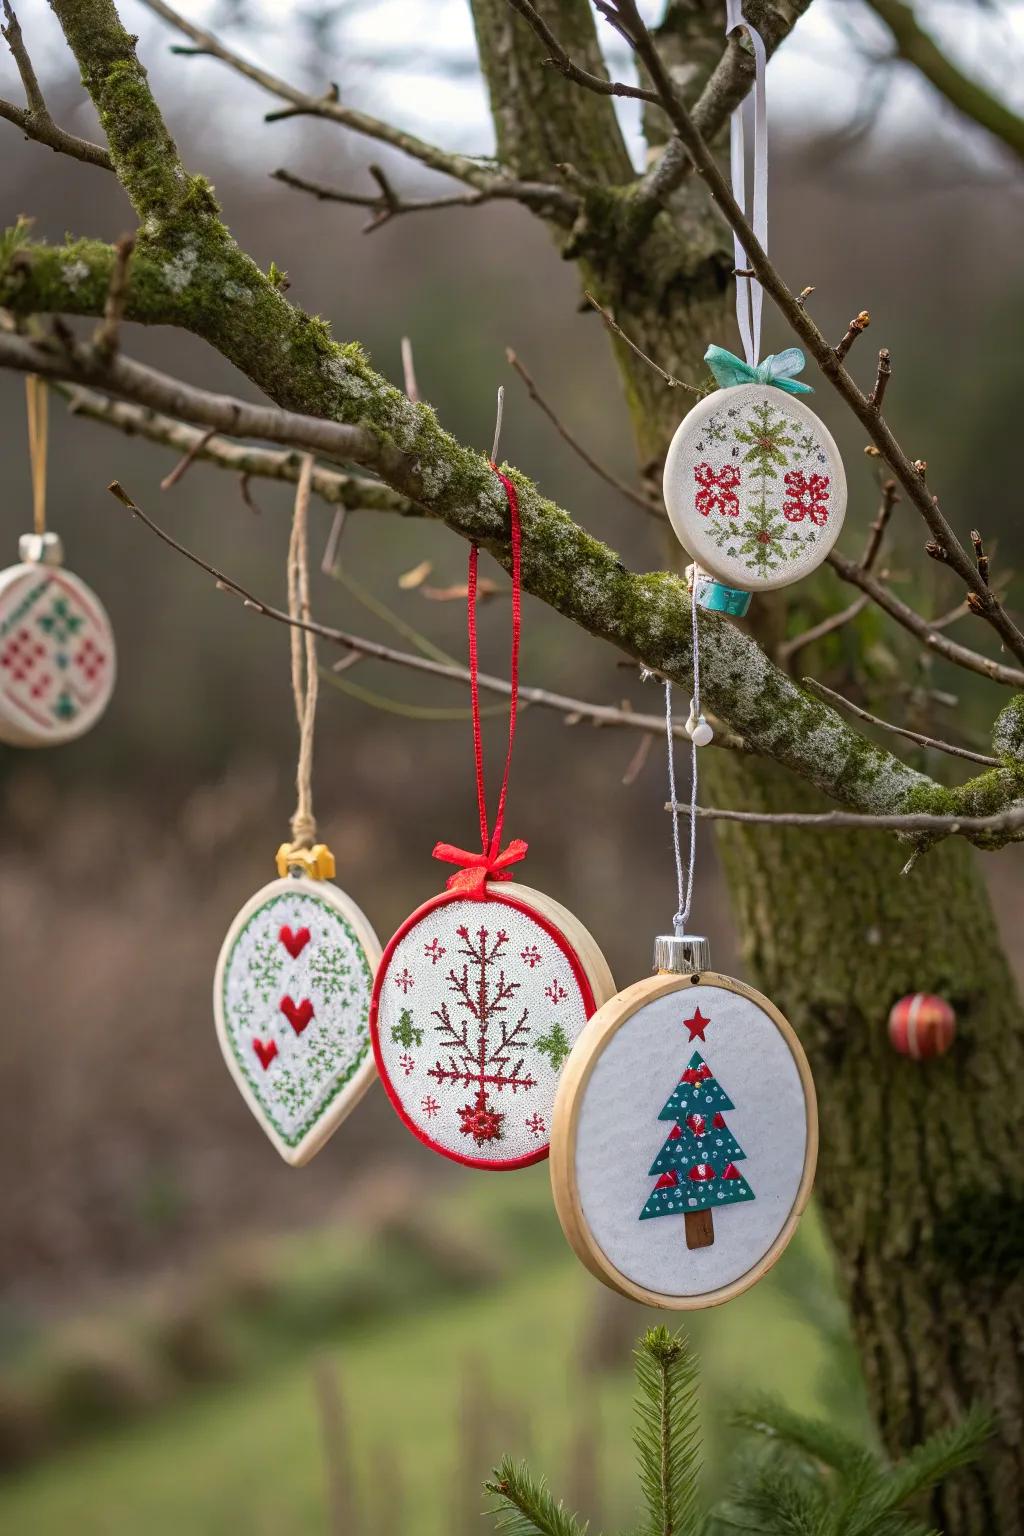
Small cross stitch designs make wonderful ornaments for any holiday. I’ve got a collection for every season that I love to hang. Use felt or batting to stuff them for a soft, dimensional effect. I usually add a small loop of ribbon at the top for easy hanging.
A few helpful options:
- Wooden Embroidery Hoops: Easily frame your cross stitch projects with these durable wooden embroidery hoops for perfect ornaments.
- Holiday Ribbon Set: Add a festive touch by hanging your cross stitch ornaments with charming holiday ribbons.
- Cross Stitch Ornament Kits: Discover complete kits for creating beautiful cross stitch ornaments ready to hang and display.
10. Add to Pincushions
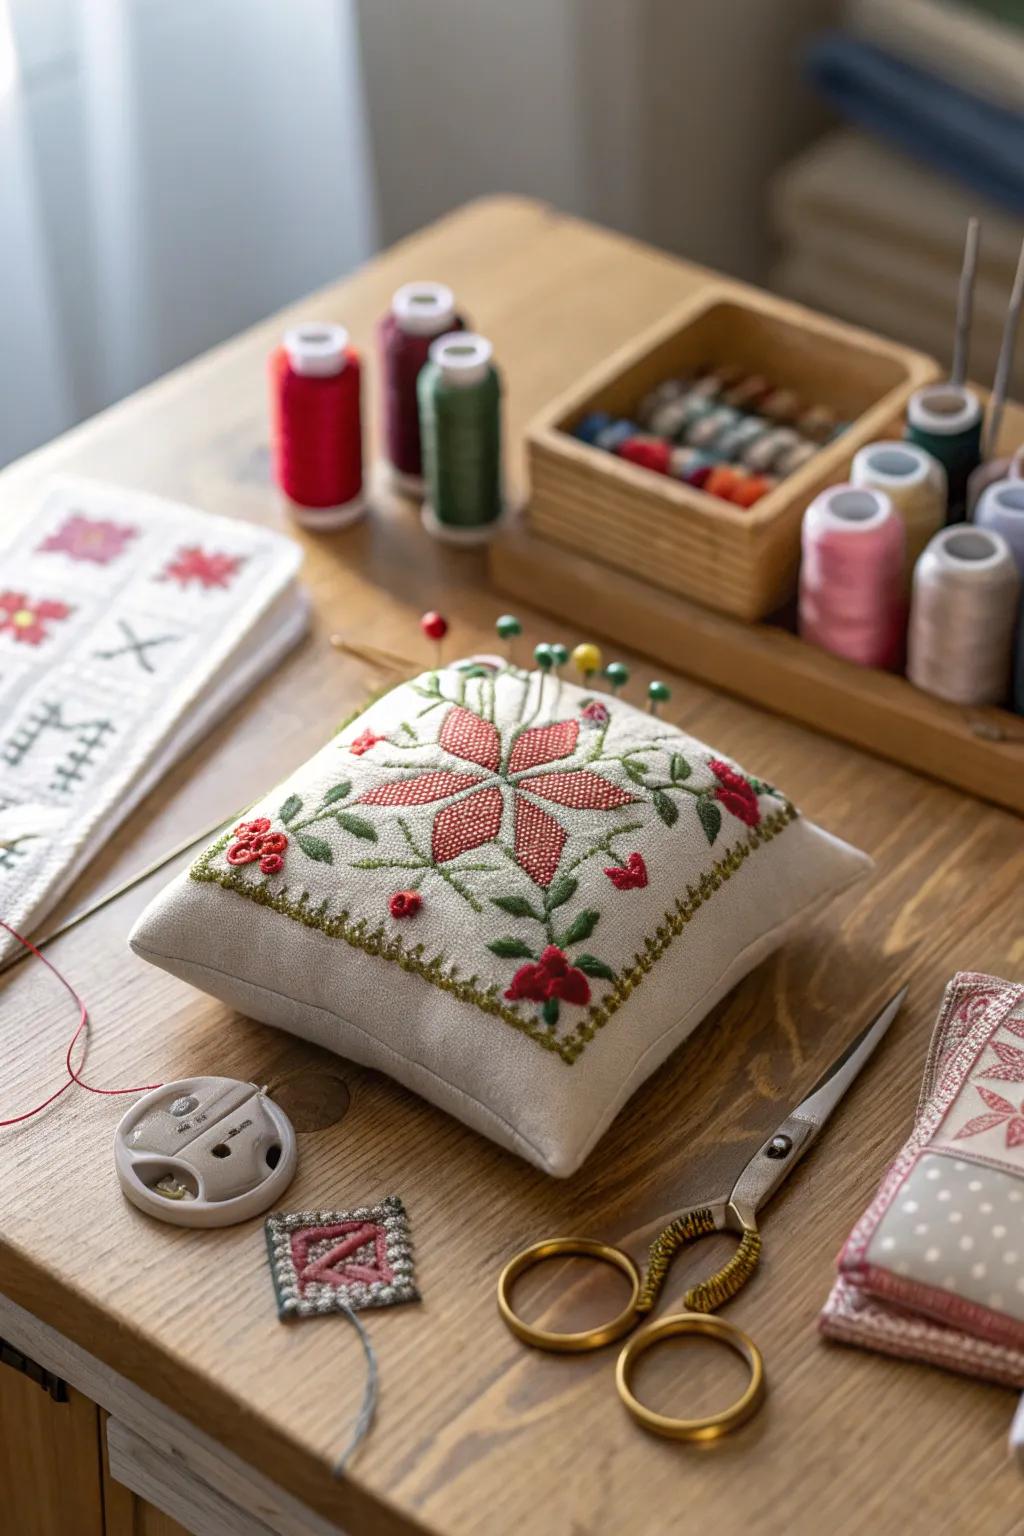
Create a pincushion with a cross stitch top for your sewing space. It’s both decorative and functional, and a great gift for crafters. Choose a fabric that complements your cross stitch design for the sides and bottom. I like to fill mine with crushed walnut shells for extra weight.
Useful items to consider:
- Cross Stitch Kits for Beginners: Start your pincushion project with easy cross stitch kits to create beautiful designs effortlessly.
- High-Quality Sewing Pins: Enhance your sewing experience with durable, sharp pins perfect for any crafting project.
- Embroidery Thread Variety Pack: Add vibrant colors to your cross stitch pincushion with this comprehensive thread variety pack.
11. Use as Patchwork
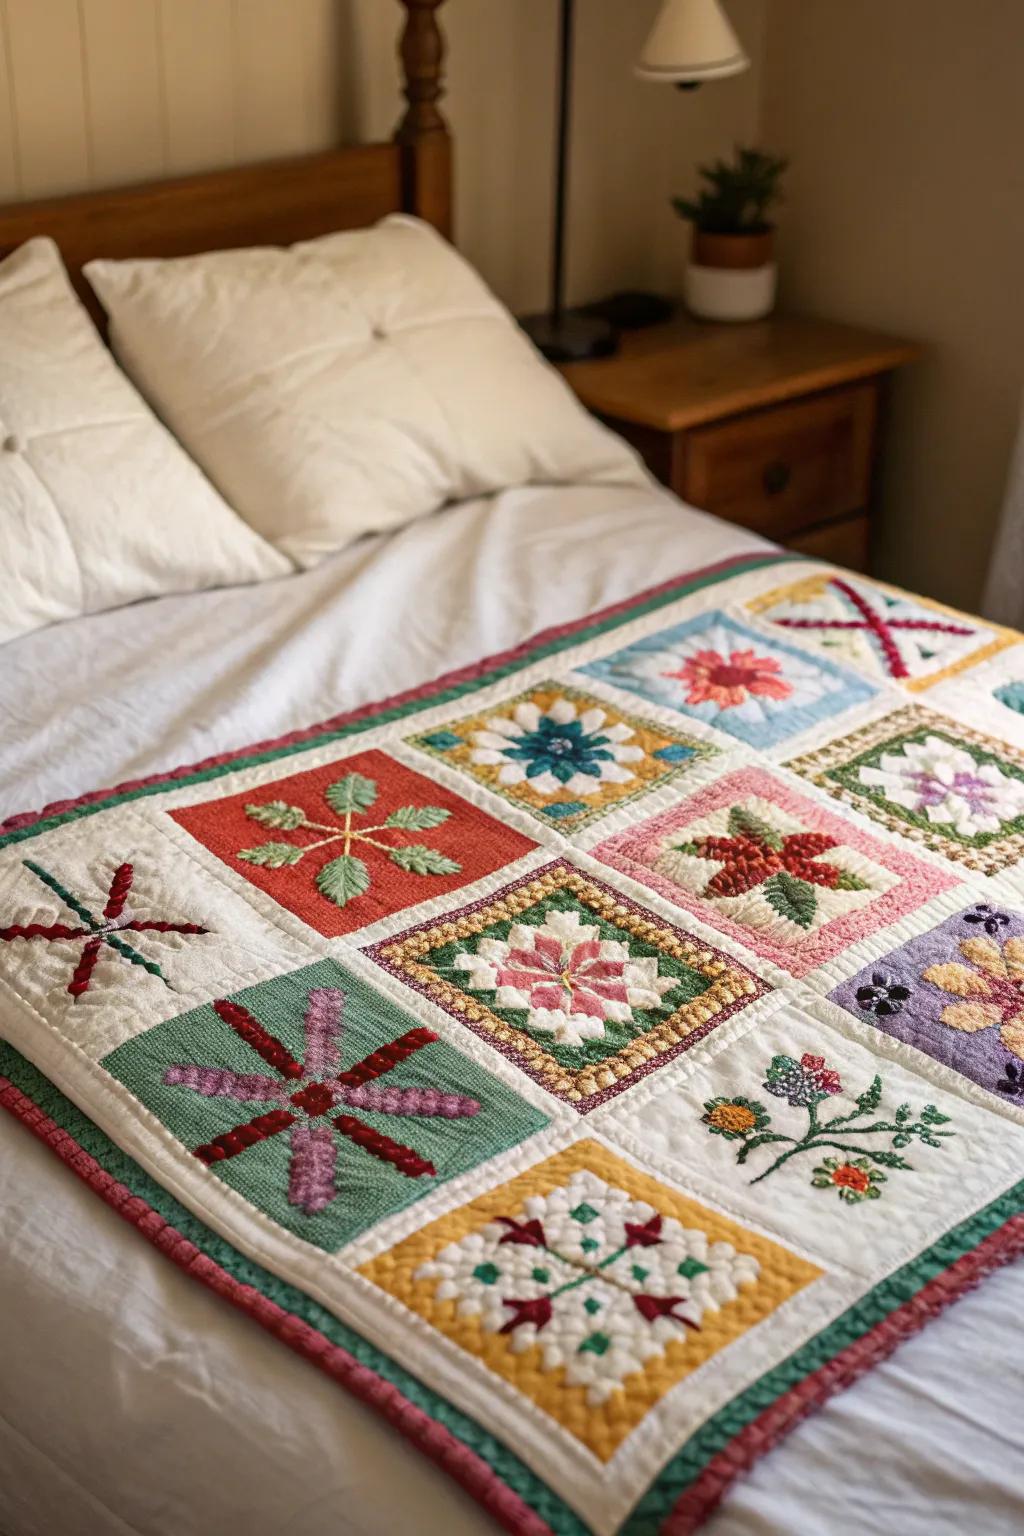
Incorporate cross stitch into patchwork quilts. I’ve added small motifs to my quilts, giving them a unique and personal touch. This is a great way to use up small pieces of finished cross stitch projects. I find it’s a beautiful way to preserve memories in a functional piece of art.
Check if these fit your needs:
- Cross Stitch Starter Kit: Create stunning quilt motifs. This starter kit helps you begin your cross stitch journey today.
- Patchwork Quilt Fabric Squares: Enhance quilts with fabric squares. Perfect for incorporating custom cross stitch designs.
- Embroidery Hoop Set: Achieve perfect tension and precision with this embroidery hoop set. Elevate your cross stitch projects.
12. Make a Mug Cozy
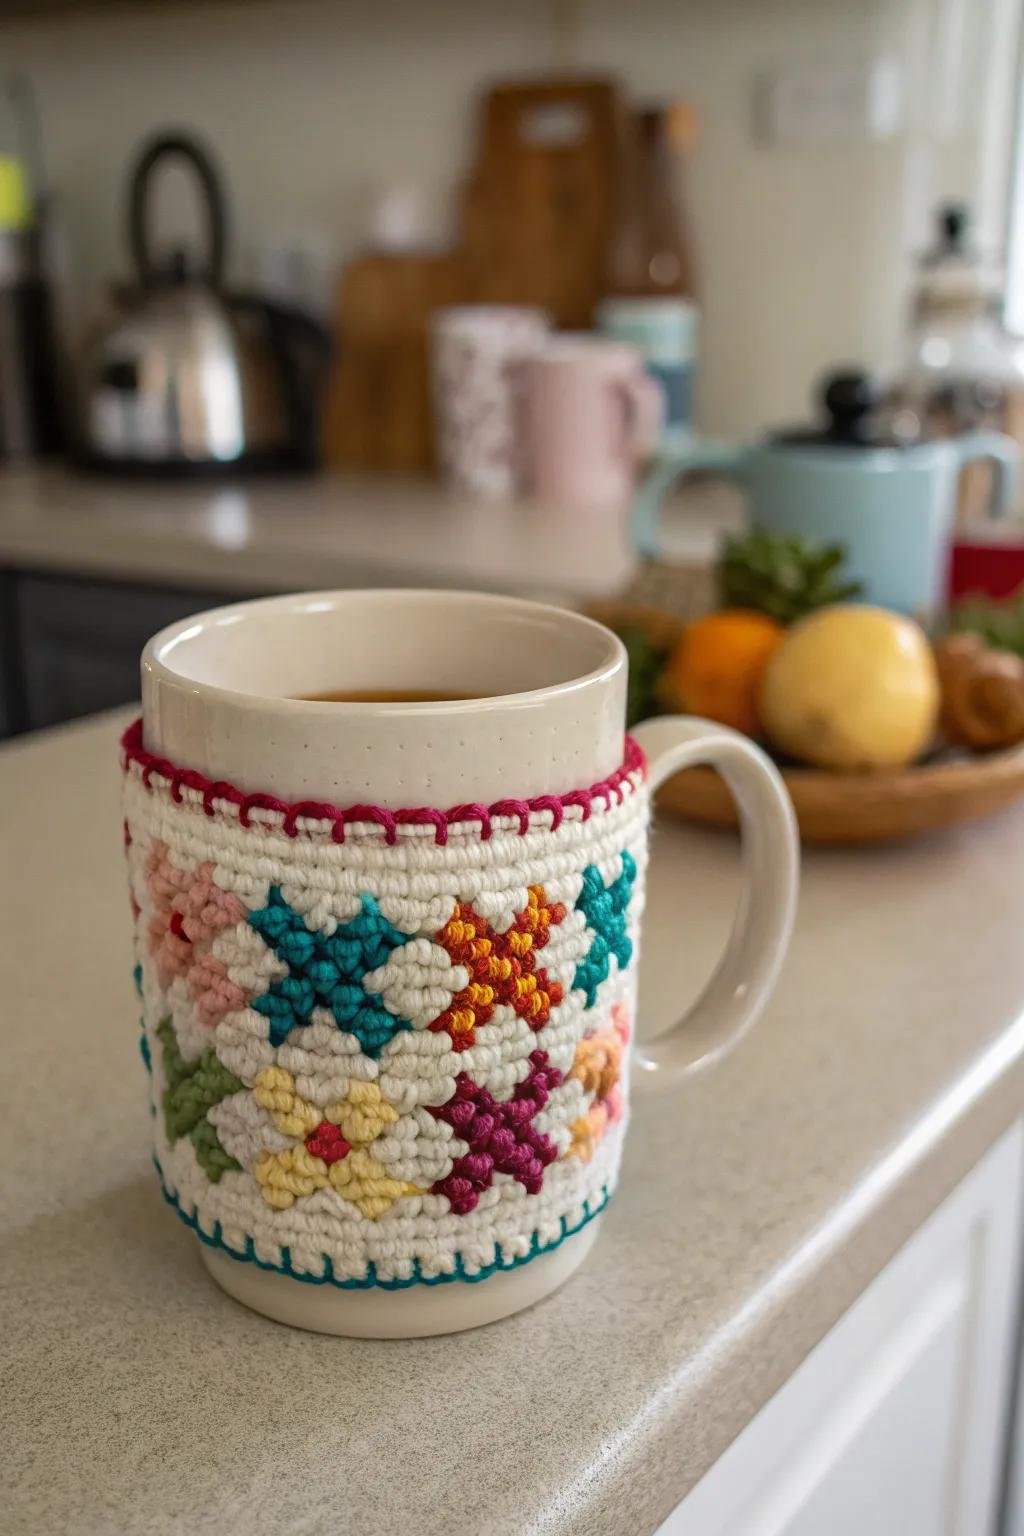
A cross stitch mug cozy is both adorable and functional. They’re perfect for keeping your drink warm and your hands cool. Choose a soft, washable yarn for the edging to make it extra comfortable. I think they make great gifts for teachers or coworkers during the holidays.
A few things you might like:
- Cross Stitch Kit: Start creating your own mug cozy with an easy-to-use cross stitch kit. Enjoy crafting today!
- Acrylic Yarn Set: Add vibrant colors to your mug cozy with a versatile acrylic yarn set. Spark creativity now!
- Embroidery Hoop Set: Ensure precision in your stitches with a reliable embroidery hoop set. Craft comfortably anytime!
13. Make a Corner Bookmark
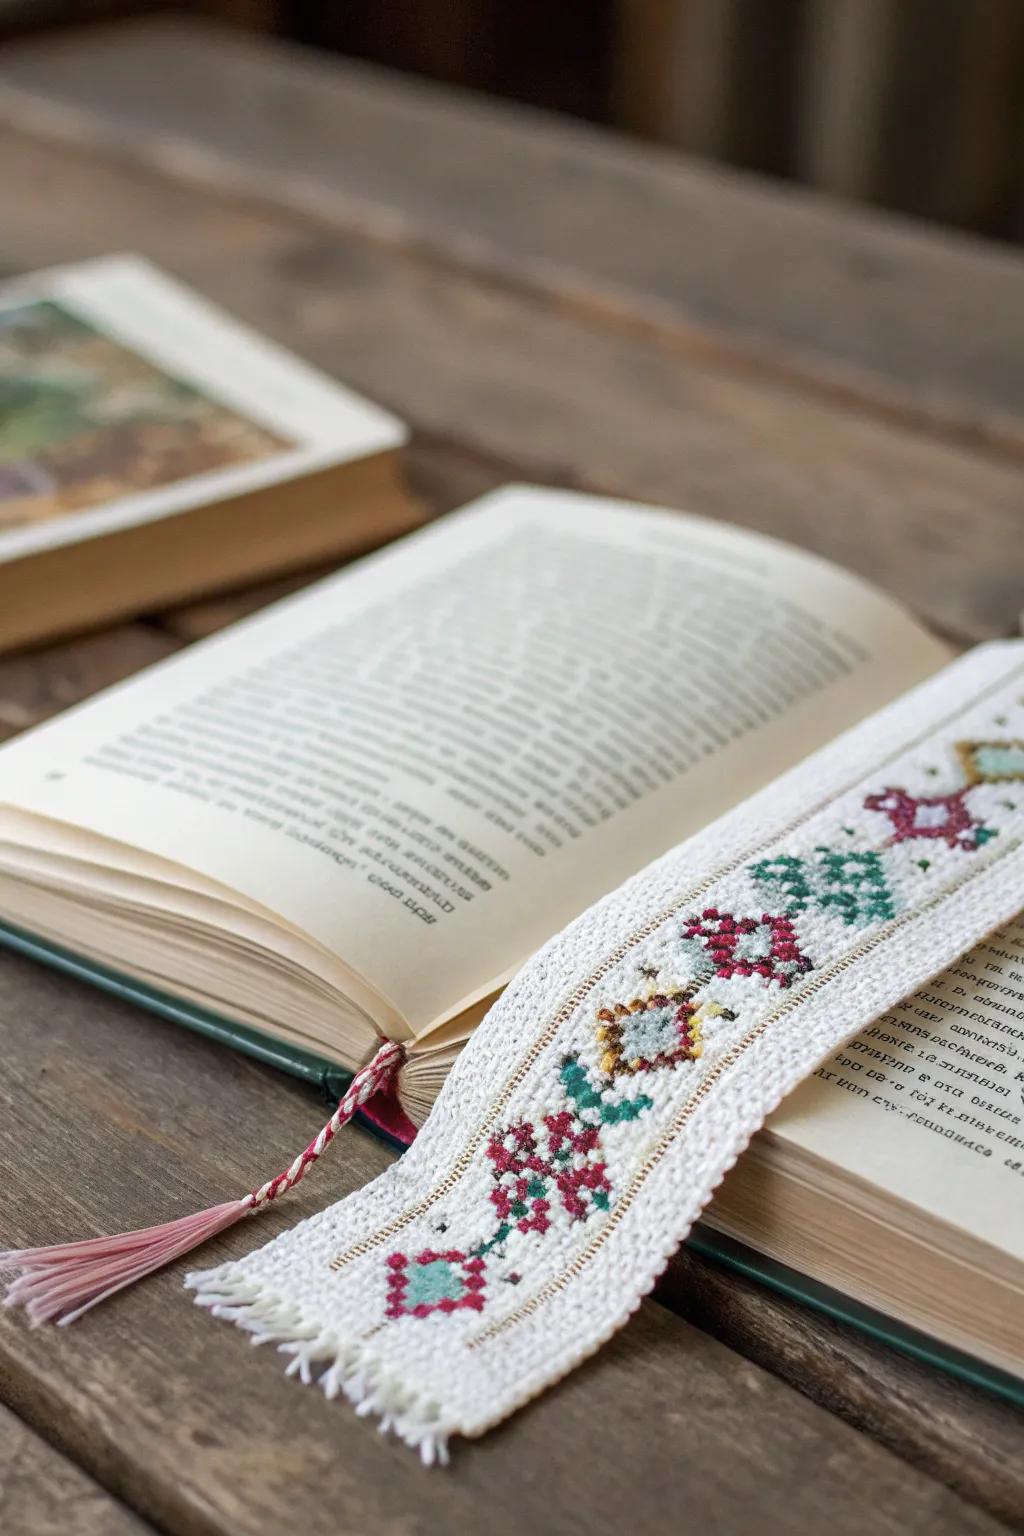
Craft a cross stitch corner bookmark for your favorite reads. It’s a small project that combines practicality with beauty. Use felt or stiff interfacing to give it structure and prevent it from slipping. I like to personalize mine with the recipient’s initials.
Maybe worth checking out:
- Cross Stitch Fabric Aida Cloth: Start your cross stitch bookmark with quality Aida cloth for easy stitching and durability.
- Embroidery Floss Set: Enhance your designs with vibrant embroidery floss, perfect for detailed corner bookmarks.
- Cross Stitch Needle Set: Choose suitable cross stitch needles for smooth and efficient bookmark creation.
14. Embellish Tote Bags
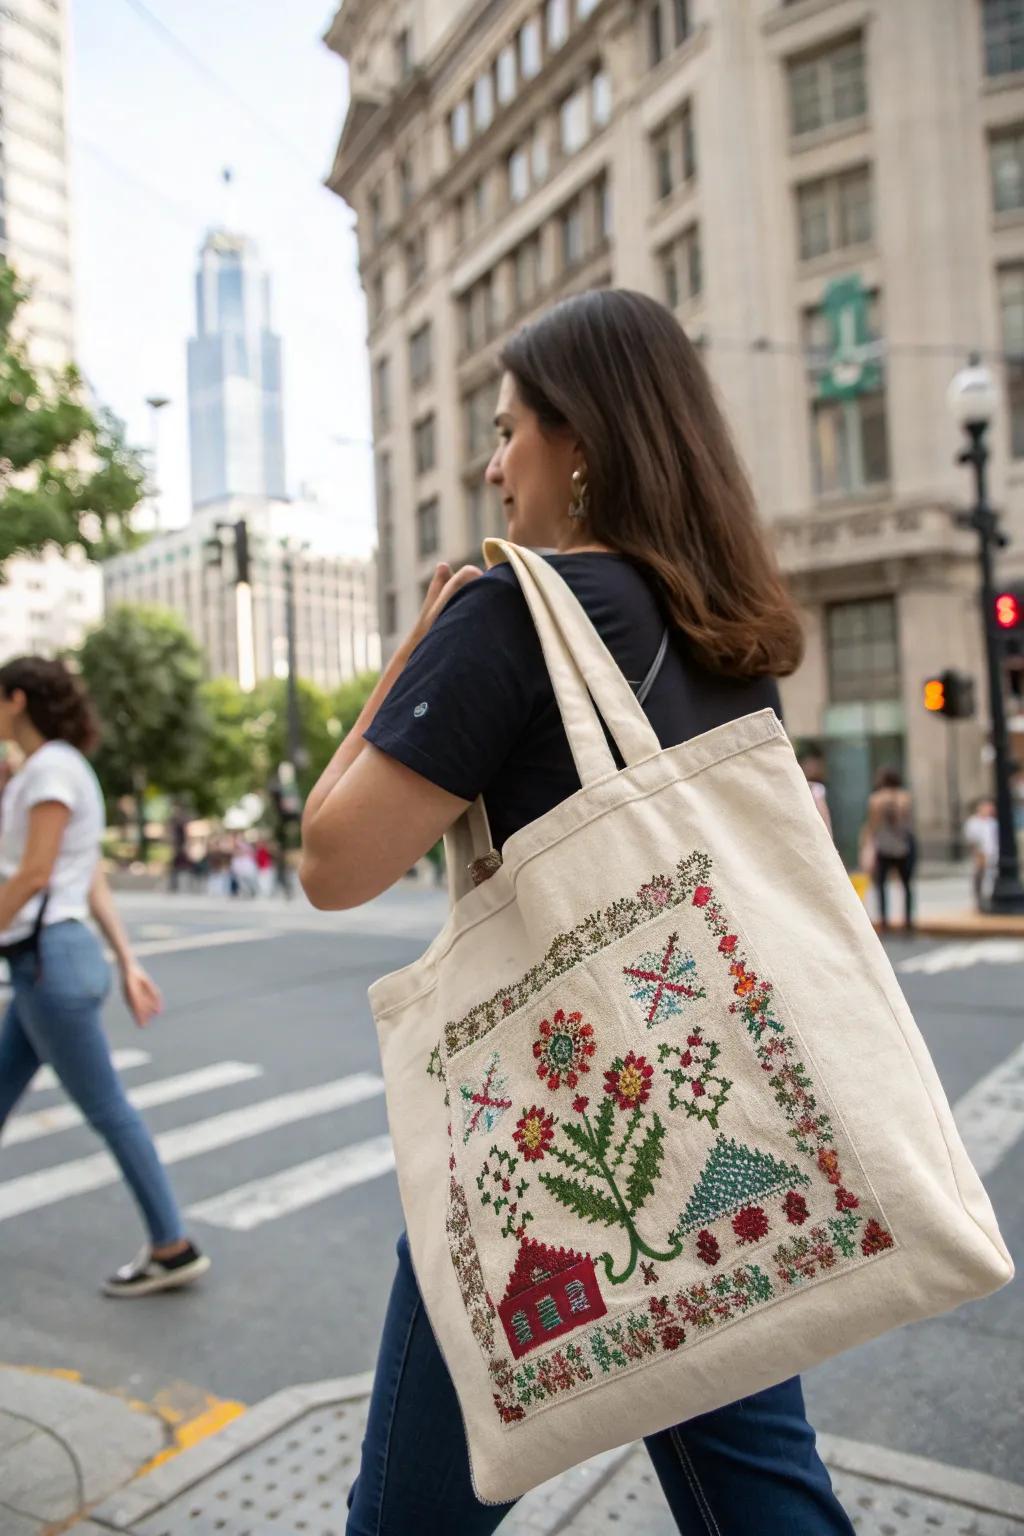
Sew your cross stitch creations onto tote bags for a stylish and practical accessory. I always get compliments when I carry mine around town. Be sure to use a sturdy fabric for the bag to support the weight of the cross stitch. I typically reinforce the seams with a double stitch for extra durability.
Some handy options:
- Blank Canvas Tote Bags: Customize your style with versatile blank canvas tote bags, perfect for showcasing cross stitch art.
- Embroidery Thread Set: Create vibrant designs with an array of colorful embroidery threads for your tote bag projects.
- Cross Stitch Needle Set: Enhance your crafting experience with high-quality needles designed for cross stitching on fabric.
15. Wrap Around Candle Holders
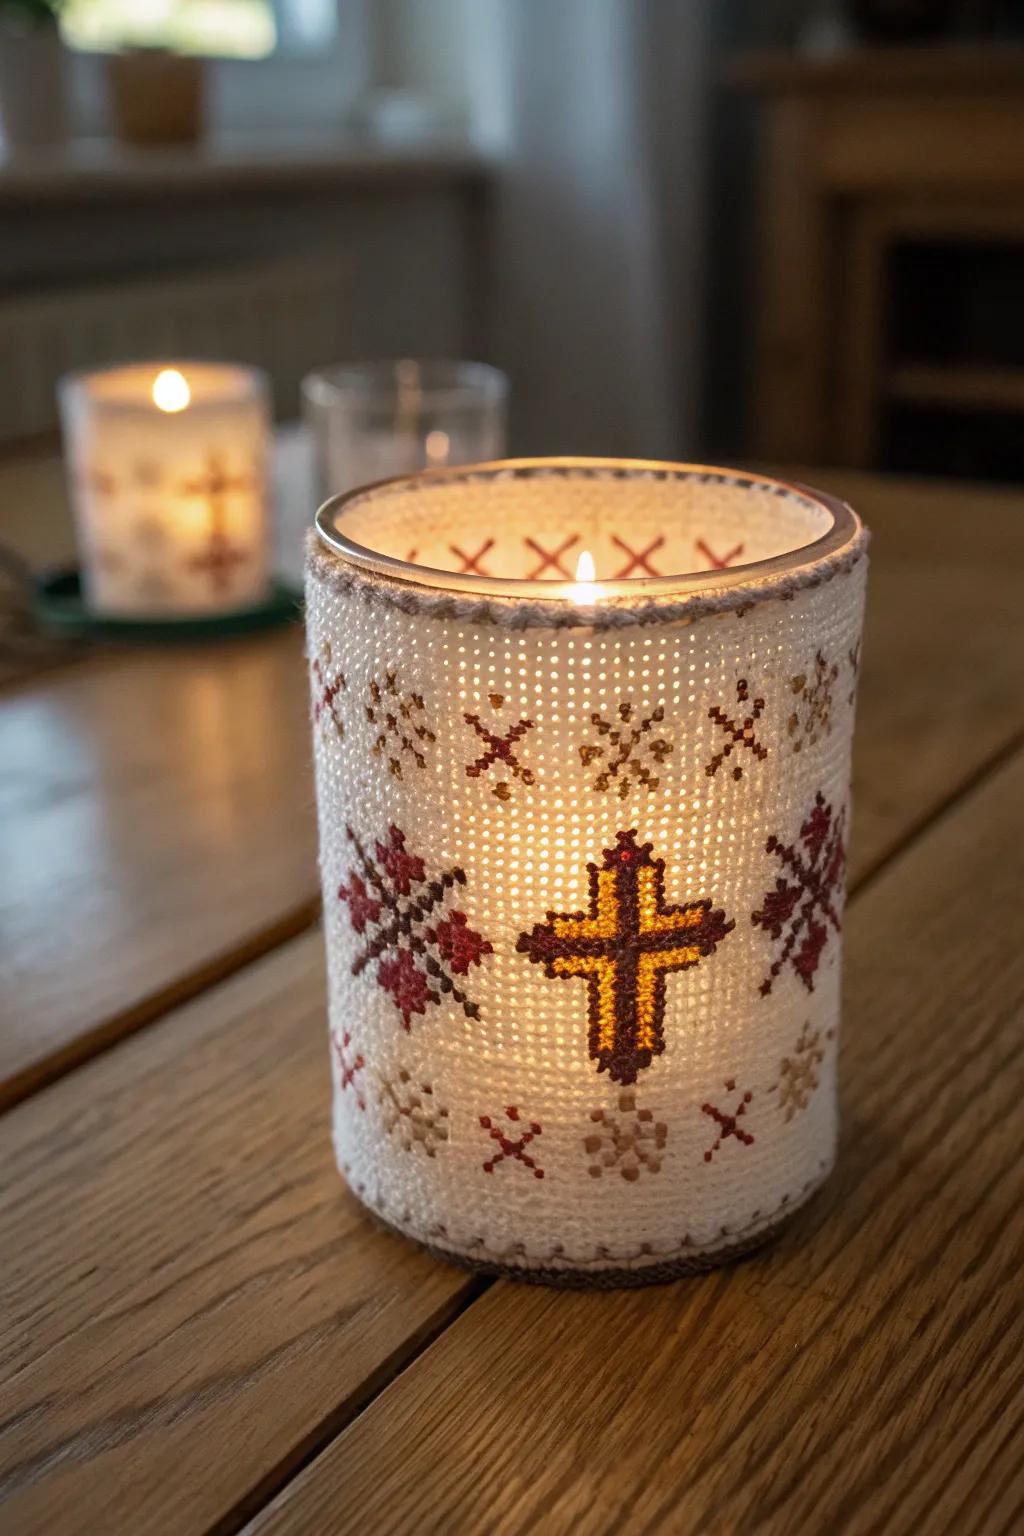
Wrap your cross stitch around a candle holder for a cozy, ambient glow. I adore the warm light filtering through the stitches. Choose LED candles to avoid any fire hazards. I’ve found that battery-operated fairy lights woven through the design can also look magical.
You might like:
- Glass Candle Holders: Create a cozy ambiance with glass candle holders that highlight your cross stitch designs.
- Cross Stitch Kits: Discover various cross stitch kits to personalize your candle holders with unique patterns.
- LED Flameless Candles: Ensure safety while maintaining ambiance with realistic LED flameless candles for your holders.
16. Decorate with Magnets
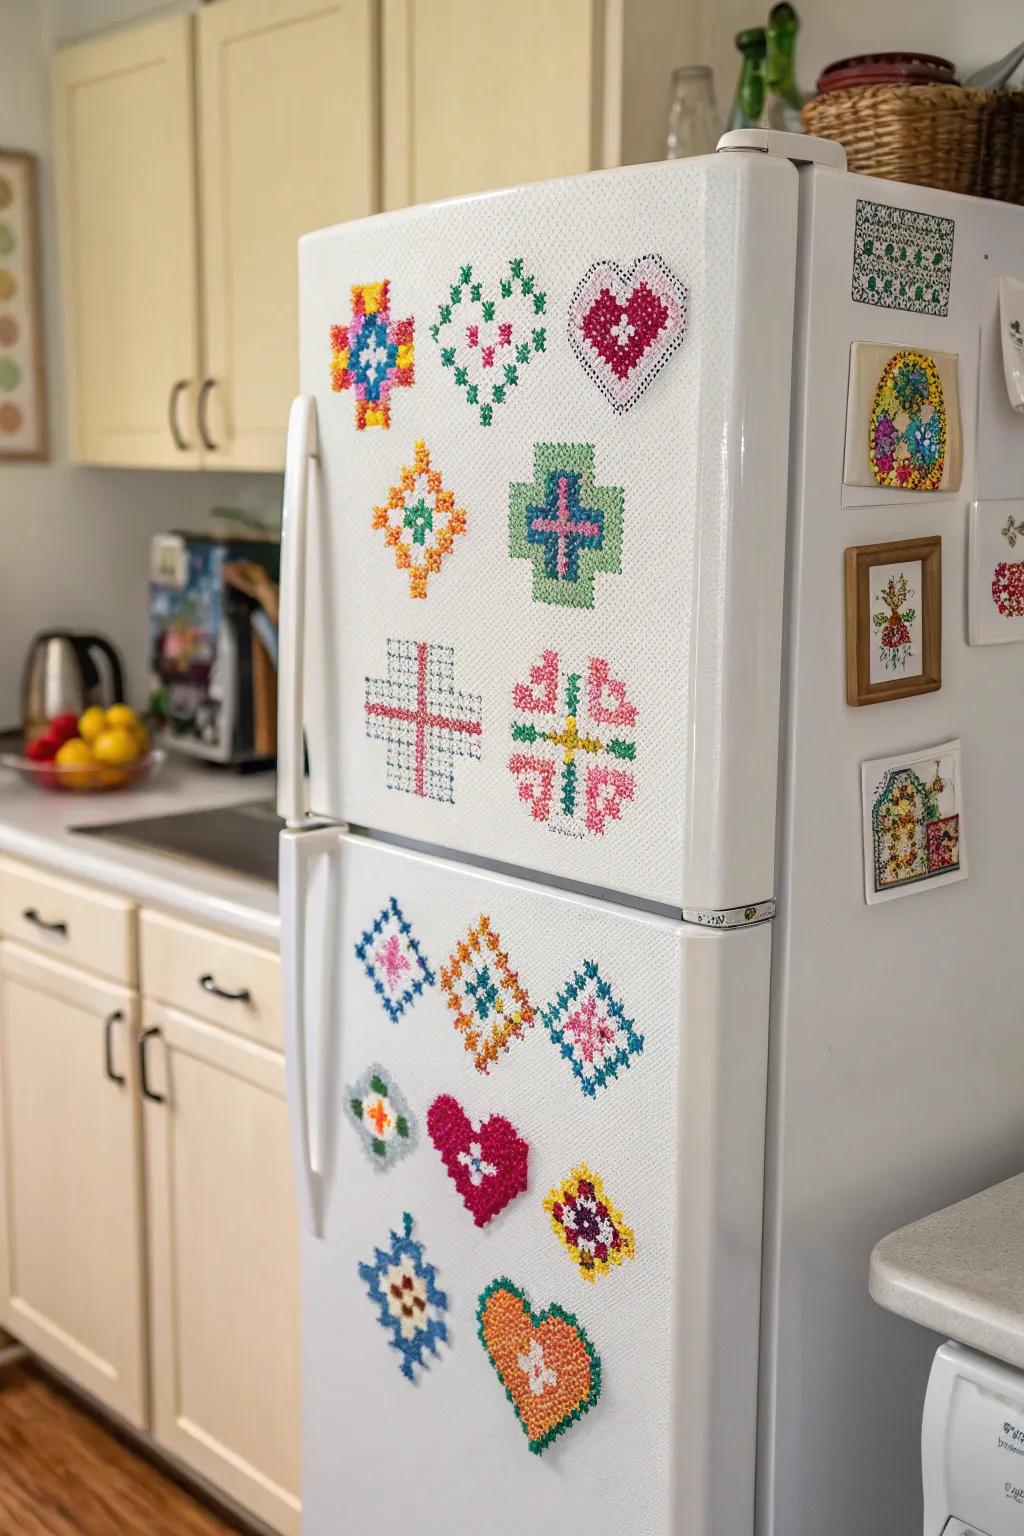
Turn your cross stitch pieces into magnets to adorn your fridge. It’s a quick project and adds a touch of personality to your kitchen. Attach strong magnets to the back using hot glue or strong adhesive. I plan on making some with funny sayings to brighten up my kitchen.
Items that may come in handy:
- Adhesive Magnetic Sheets: Quickly turn your cross stitch creations into fridge magnets with these easy-to-use magnetic sheets.
- Self-Adhesive Foam Pads: Add depth to your cross stitch magnets using versatile, easy-to-apply foam pads.
- Precision Fabric Scissors: Ensure clean cuts on your cross stitch projects with these precision crafting scissors.


